When you've invested in an RV, even minor scratches can be cause for concern. From unexpected door dings at campgrounds to tree branches that seemed farther away than they actually were, RV scratches are an unfortunate reality of ownership. Understanding your repair options helps maintain both your vehicle's appearance and its value over time.
| Topic | Key Points |
|---|---|
| DIY vs. Professional Repair | Surface scratches may be DIY-appropriate; deeper scratches require professional attention |
| Common RV Scratch Causes | Tree branches, campground obstacles, door dings, highway debris |
| Repair Techniques | Touch-up paint, paintless repair, full panel refinishing depending on severity |
| Prevention Strategies | Protective films, careful parking, regular waxing, trim branch routes |
Understanding RV Scratch Types and Their Impact
Not all RV scratches are created equal. The repair approach depends largely on the scratch depth and location. Surface scratches that haven't penetrated the clear coat can often be buffed out, while deeper scratches that reach the primer or metal require more comprehensive repair techniques.
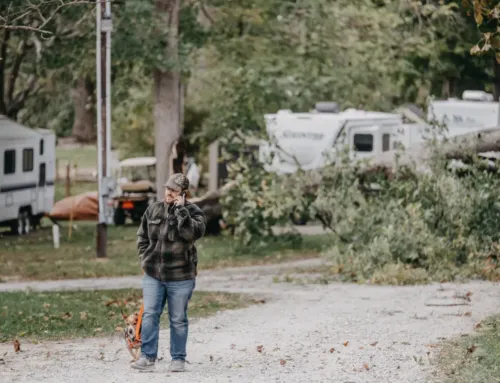
Tree branch scratches are among the most common damage RV owners face. These typically occur when navigating campgrounds with overhanging limbs or during storage under trees. According to a study by the RV Industry Association, over 40% of RV damage claims involve exterior scratches, with tree encounters being a leading cause.
Door dings and parking lot damage represent another frequent source of RV scratches. The large surface area of an RV makes it particularly vulnerable in tight spaces. These minor impacts can create both dents and scratches that, while seemingly minor, can lead to more significant problems if left unaddressed, including rust and paint deterioration.
Assessing Scratch Severity and Repair Options
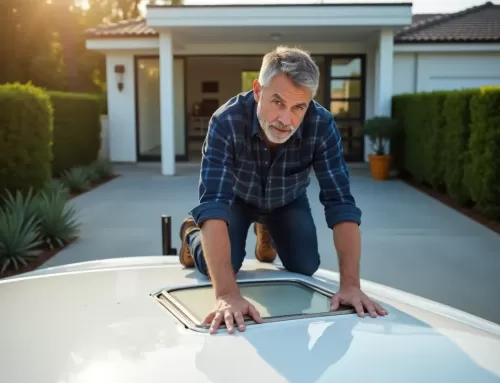
When examining RV scratches, it's important to determine the depth before proceeding with repairs. A simple test involves running your fingernail across the scratch – if your nail catches, the scratch has likely penetrated beyond the clear coat and will require professional attention.
For surface-level scratches from everyday use, there are several repair approaches to consider:
- Polishing compounds work effectively on light surface scratches by removing a microscopic layer of clear coat to level the surface.
- Touch-up paint provides a good solution for small, deeper scratches that have reached the color coat or primer.
- Paintless dent repair techniques can address door dings that haven't damaged the paint but have created a depression.
- Professional repainting becomes necessary when scratches have penetrated multiple layers of paint or cover large areas.
- Clear coat restoration helps with weathered surfaces showing multiple fine scratches from environmental exposure.
The size of an RV presents unique challenges for scratch repair. While a small scratch on a car might be a simple fix, the same damage on an RV often requires specialized equipment and expertise. This is particularly true when dealing with the fiberglass or aluminum exteriors common to many RVs, which require different repair approaches than traditional automotive steel panels.
Professional RV Scratch Repair Process
When professional repair becomes necessary, understanding the process helps set appropriate expectations. The repair begins with a thorough assessment to determine the full extent of the damage, which may reveal issues not visible to the untrained eye.
Professional RV scratch repair typically involves:
- Surface preparation including cleaning and sanding to create a proper foundation for repairs
- Primer application to protect the underlying material and ensure proper paint adhesion
- Color matching using computerized systems to precisely blend with the existing finish
- Clear coat application to provide UV protection and a seamless appearance
- Buffing and polishing to integrate the repair with the surrounding areas
The large paint booth facilities required for RV repairs are not available at all body shops. For example, our 80-foot paint booth at Downtown Autobody is specifically designed to accommodate oversized vehicles like RVs, ensuring complete, even coverage during the refinishing process.
Assessing Scratch Severity
Determine scratch depth to choose between DIY or professional repair.
Repair Techniques
Use touch-up paint, polish, or professional services depending on damage.
Prevention Strategies
Consider protective films, careful navigation, and regular maintenance to avoid scratches.
After repairs are completed, proper care is essential to maintain the finish. This includes regular washing with RV-appropriate cleaners, applying protective wax, and when possible, storing your RV under cover to minimize exposure to environmental elements that can cause new scratches or damage the repairs.
Preventing Future RV Scratches
Prevention is always more cost-effective than repair when it comes to RV scratches. Planning your routes to avoid low-hanging branches and tight spaces can significantly reduce the risk of damage. When visiting unfamiliar campgrounds, a walk-through of your assigned space before parking can help identify potential hazards.
For long-term protection, consider investing in protective films for vulnerable areas. These clear applications are virtually invisible but provide a sacrificial layer that can absorb impacts from branches and road debris without damaging the underlying paint.
Regular maintenance also plays a role in scratch prevention. Waxing your RV creates a protective barrier against minor abrasions, while keeping tree limbs trimmed around storage areas eliminates a common source of scratches.
When to Seek Professional Help
While DIY options exist for minor scratches, recognizing when to call in professionals is crucial to avoiding costly mistakes. If a scratch has penetrated to the primer or metal, exposed large areas of underlying material, or is accompanied by denting, professional repair is the safest option.
At Downtown Autobody, our I-CAR Gold Class certified technicians have the specialized training needed to properly address RV exterior damage. This certification requires ongoing education to stay current with the latest repair techniques for all vehicle types, including recreational vehicles.
Remember that timely attention to scratches prevents them from worsening due to environmental exposure. What begins as a simple scratch can evolve into a more significant issue if water penetrates to underlying materials, potentially leading to corrosion or structural damage.
Conclusion
From tree branch encounters to door dings, RV scratches are an inevitable part of ownership. Understanding your repair options helps maintain both the appearance and value of your investment. Whether you choose DIY methods for minor surface scratches or seek professional assistance for deeper damage, addressing scratches promptly prevents more extensive problems down the road.
If you're uncertain about the best approach for your RV's scratch repair needs, consider consulting with certified auto body professionals who specialize in oversized vehicle repairs. Their expertise can save you time, money, and ensure your RV continues to provide the enjoyment and value you expect for years to come.