
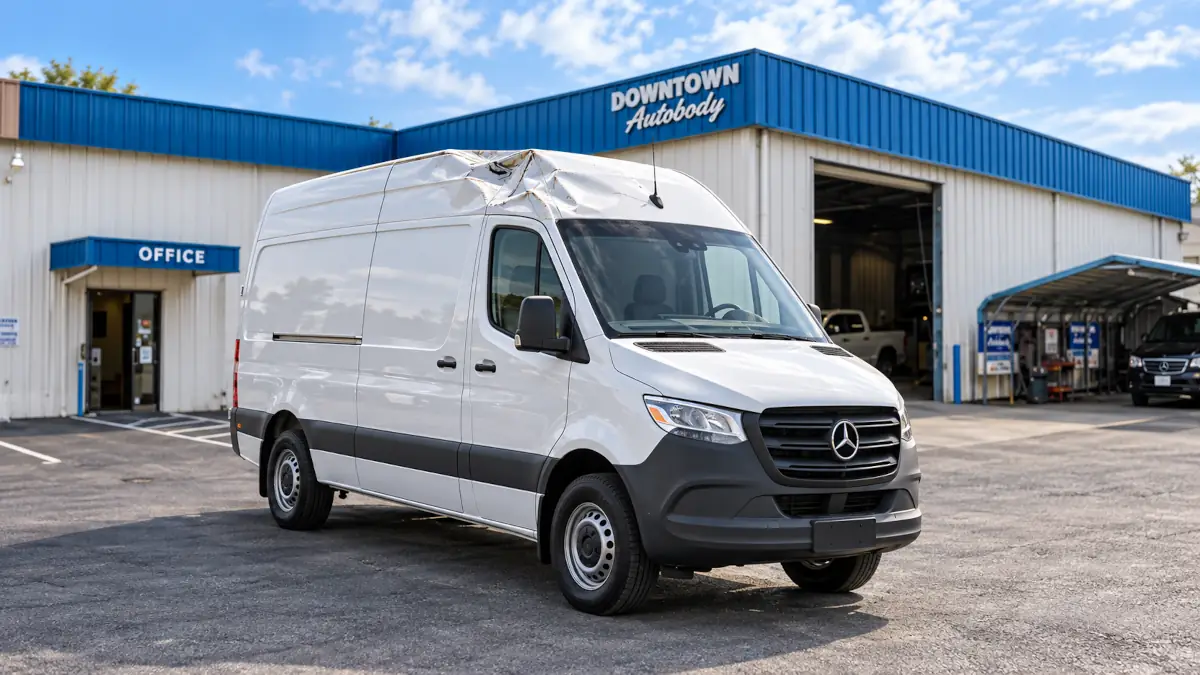
A high roof RV collision can involve more than a dented panel: roof equipment, seams, wiring, interior fittings, and vehicle structure may also be affected. If you own a tall RV, Sprinter, ProMaster, or conversion van, careful shop selection and clear damage records can help keep the repair plan safe and manageable.
Key Takeaways
- How do I find an RV collision shop that can fit a high-roof vehicle? Share the vehicle’s full dimensions and confirm usable clearance, maneuvering room, and the route into the repair bay before arranging a visit.
- What should I provide when requesting an assessment? Send the RV or van’s make and type, body and roof details, measurements, and clear photographs of the impact and nearby areas.
- Why can visible collision damage be misleading? A dent, crack, or shifted seam can conceal damage to structure, wiring, mechanical components, or water barriers.
- Is an initial insurance estimate final? No. Teardown can reveal hidden damage that needs documentation, a supplemental estimate, and insurer review.
- What should I review before accepting repairs? Compare the finished work with the agreed scope, including panel fit, finish, affected functions, and inspection of repaired roof or seam areas.
- How do I plan transport for a damaged tall RV? Give the transport provider the vehicle’s dimensions, roof equipment, damage location, and condition so loading and route requirements can be considered.
Choose a shop that can handle your vehicle’s height and construction
Before scheduling, get the vehicle’s overall height, width, length, and weight, including fixed roof equipment such as air-conditioning units, racks, or satellite hardware. Sharing these details early lets the shop assess access, bay clearance, and whether the vehicle can be moved safely through the facility.
Ask about usable door and bay clearance, turning room, and overhead obstructions along the route into the work area. A posted door height alone does not establish that mirrors, roof fixtures, and the full vehicle can clear every turn and overhead point.
Explain whether the vehicle is an RV, Sprinter, ProMaster, or conversion van, and describe its body construction and roof modifications. A factory high-roof van, a converted van, and a motor coach can have different panels, interior systems, repair access, and exterior materials.
Choose a team familiar with RV body and exterior repairs instead of assuming a standard auto-body setup can accommodate a tall, wide vehicle. Our Recreational Vehicle Body Shop handles recreational vehicles ranging from basic campers to motor coaches, with work that includes scrapes, dents, fiberglass, and gel coat repairs.
For a high roof RV collision, the right first step is a direct conversation about the vehicle’s actual dimensions and construction, not an assumption based on its model name. When arranging an assessment, describe roof additions and prior modifications, since they can change both clearance and repair access.
Document the damage and look beyond the visible impact
Photograph the vehicle from several angles, then take close-ups of the impact, roofline, seams, windows, and nearby panels. Include an object for scale when useful, but do not climb onto a damaged roof to get a better view.
Record warning lights, unusual handling, damaged lights or wiring, water inside, and doors or slide-outs that no longer operate normally. These details can point to damage beyond the exterior skin and help guide a more complete collision damage assessment.
Have structural, mechanical, electrical, and water-entry concerns assessed alongside visible body damage. A cracked panel or shifted seam may hide damage behind it, so cosmetic repair alone may not restore the vehicle to its pre-accident condition.
If the RV or van may be unsafe to drive, do not drive it to the shop. Arrange an appropriate tow or transport plan and describe the vehicle’s condition so the operator can select a safe loading approach.
For the initial assessment, organize photos by area and note when you took them. A simple record of what happened, what changed afterward, and which features stopped working gives the repair team and insurer a clearer starting point.

Assess roof, fiberglass, and upper-body repairs carefully
Treat roof panels, seams, vents, and the roof-to-wall transition as part of the collision inspection. A split seam or displaced roof fitting can create a path for water, even when the interior appears dry during the first check.
For fiberglass, look for cracks, displaced sections, soft areas, and signs of separation or delamination. Delamination occurs when bonded layers separate, so repairing only the visible surface may leave underlying damage unresolved.
Fiberglass and gel coat have different jobs: fiberglass forms the composite shell, while gel coat is the exterior finish. The repair method should address the damaged layer, and our RV repair and body work articles include topics such as slide-out and paint damage.
Fiberglass Repair addresses damage to the RV’s fiberglass so technicians can restore the affected area. It suits this part of the assessment because the repair needs to consider the condition of the composite material, not just the surface appearance.
Gel Coat Repair uses a precise process intended to provide a polished finish. It is relevant when the exterior gel coat is damaged and the finish needs attention as part of the repair plan.
Inspect slide-out edges and surrounding seals for impact or misalignment, and check the interior near damaged roof and wall areas for dampness or staining. For a high roof RV collision, prompt attention to compromised seams and panels can help limit additional water damage while the repair plan is being arranged.
Review the estimate, teardown findings, and insurance steps
Compare estimates by the work included, not by the total alone. Review affected areas, labor operations, parts, paint work, and whether the proposal calls for repair or replacement of each damaged component.
An initial estimate is a starting assessment. Once the shop removes trim or opens an affected area during teardown, technicians may find concealed damage that requires photographs, a documented supplemental estimate, and insurer review before additional work proceeds.
Keep dated photographs, the original estimate, insurer communications, and every supplement together. This record helps you follow how the documented damage and approved repair scope change as new findings emerge.
Insurance coverage and authorization depend on the policy and claim review; the insurer must address them before a repair or payment is approved. Our collision repair information provides additional context about repair work and assessment.
At Downtown Autobody, staff handle communication with the insurance company for RV insurance repairs; typically, the RV is dropped off so an adjuster can assess the damage and authorize repairs at the facility. Ask who will share updates, what documentation the insurer needs, and how you will be contacted if the scope changes.
Plan for parts, paint matching, and repair quality
Ask how the repair plan will address paint matching across adjacent panels, graphics, and weathered exterior surfaces. A new finish may look different from an older surrounding finish, so the shop should explain how it plans to blend the repaired area with the rest of the vehicle.
Discuss parts sourcing and likely dependencies early. A replacement panel or specialized component can affect the sequence of work, and parts availability can change the expected timeline.
Our RV Paint Shop is dedicated to recreational vehicles, which makes it relevant when the repair includes refinishing large exterior areas. For the facility details, the RV Auto Paint Shop uses an 80-foot enclosed, heated, cross-draft paint booth where vehicles can be painted and baked.
At pickup, compare the completed repair with the estimate and approved supplements. Check panel fit and finish, operate affected doors and slide-outs, and look for signs of water entry near repaired roof or wall areas.
When choosing a repair plan, ask what work is covered by the estimate and how any warranty terms apply to the completed repairs. The goal remains the same: restore the vehicle as close as practical to its pre-damage condition while addressing the documented damage.
Arrange safe transport and a thorough final inspection
If towing is needed, give the transport provider the vehicle’s dimensions, weight, roof equipment, damage location, and current condition. These details help the provider account for loading requirements and route constraints before dispatch.
Coordinate arrival and loading access in advance, especially if roof damage, a disabled slide-out, or a low-clearance route affects how the vehicle can be moved. For a tall conversion van or high-roof RV collision, a transport plan should account for the vehicle as it sits now, including damaged parts that may extend beyond its normal profile.
Before accepting the repair, review the completed work against the estimate and supplements. Ask how technicians inspected repaired seams, roof areas, and affected systems, and discuss any operation or finish concern while the repair details are available.
Repair timelines can change with teardown findings, parts availability, and shop workload. Ask how the shop will share progress updates and request approval if new damage changes the repair scope.
Final Thoughts
A high roof RV collision calls for a careful match between the vehicle’s height and construction, the shop’s access conditions, and the repair work required. Share accurate dimensions, document damage beyond the visible impact, and follow estimate changes through teardown and insurer review.
When you choose an RV body shop, prioritize safe access, relevant RV repair experience, clear communication, and a final inspection that covers structure, finish, and affected systems. Safety remains paramount, and a thorough process helps keep the repair focused on restoring the vehicle’s pre-accident condition.
Frequently Asked Questions
Is RV delamination covered by insurance?
Coverage depends on what caused the delamination and the terms of the policy. Damage connected to a covered collision may be treated differently from deterioration associated with age, maintenance, or a long-term leak.
Can hail damage an RV roof even if there are no visible leaks?
Yes. Hail can dent or fracture roof materials and damage vents, caps, or rooftop equipment without immediately opening a path for water. A dry interior at first does not establish that every roof component is intact.
What are the most common collision repairs for RVs and high-roof vans?
The repair scope depends on the impact; ask the shop to inspect nearby components as well as the visibly damaged area.
How much does it cost to repair hail damage on an RV?
The cost depends on the roof and body materials, the number and location of impacts, and whether panels, vents, or other components need repair or replacement. An in-person assessment is needed to define the scope before a shop can prepare an estimate.
What should I do if I find water inside after an RV collision?
Move belongings away from the wet area and document the water’s location and any visible staining. If water is near electrical equipment, avoid touching wet components and have the area assessed before using the affected system.